IanAdams
Member
I posted this in the Make your own hoodie cult but I figured people would get some use out of it here too. Also join the cult if you're interested because there's lots of good info there about sewing machines and fabric. Here we go:
In this thread I will be showing in a step-by-step
format, how to make a crew neck sweatshirt from scratch. This is not a sewing
tutorial. If you don’t know how to sew there are a million tutorials online so
do a google search and get learned. Let’s
get started shall we?
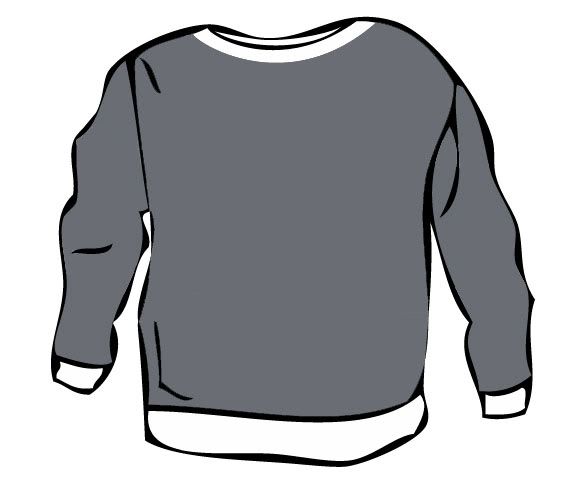
THE DESIGN: So obviously you’re going to want to
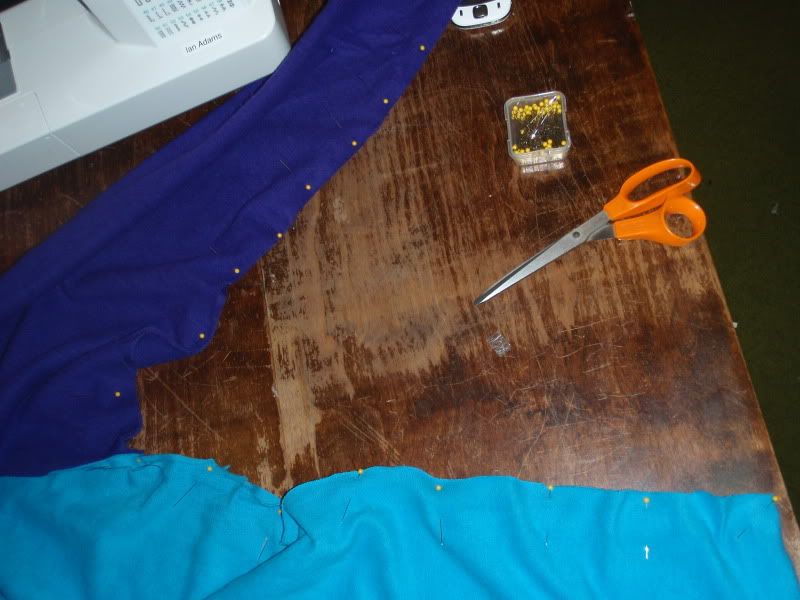
have some foresight as to what you’re gonna make. Here’s a nifty little blank that
you can use paint bucket on to preview and brainstorm ideas:
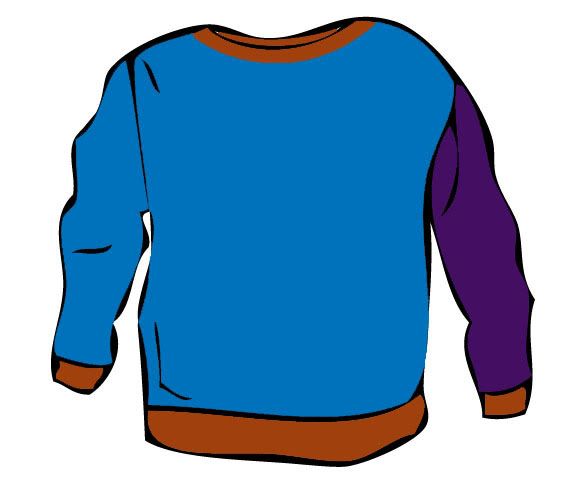
 For this tutorial we will be making the Wildberry
Poptart sweatshirt for Mr. James Amodeo (jamodeo):
WHAT YOU WILL NEED:
- Sewing machine that you are familiar
with and that is setup and ready to go.
- [endif]Sharp Scissors
- A ruler and measuring tape
- [endif]A seam ripper(to use if you mess
something up, which you probably will your first time)
- Pins
- [endif]A pencil, pen, sharpie or all three
preferably(for marking stuff)
- [endif]2 to 2.5 yards of sweatshirt fabric,
depending on how big you want it. If you want different color sleeves and all
that jazz, half a yard equals about one sleeve or about one body panel (front
or back).
- ½ yard of ribbing(rib knit fabric its
sometimes called)
- A pattern or something that you would
like to trace.
- Background entertainment. Tv or music.
You will be here awhile(first one took me 4+ hours) so make it comfy.
- [endif]A big table free of debris
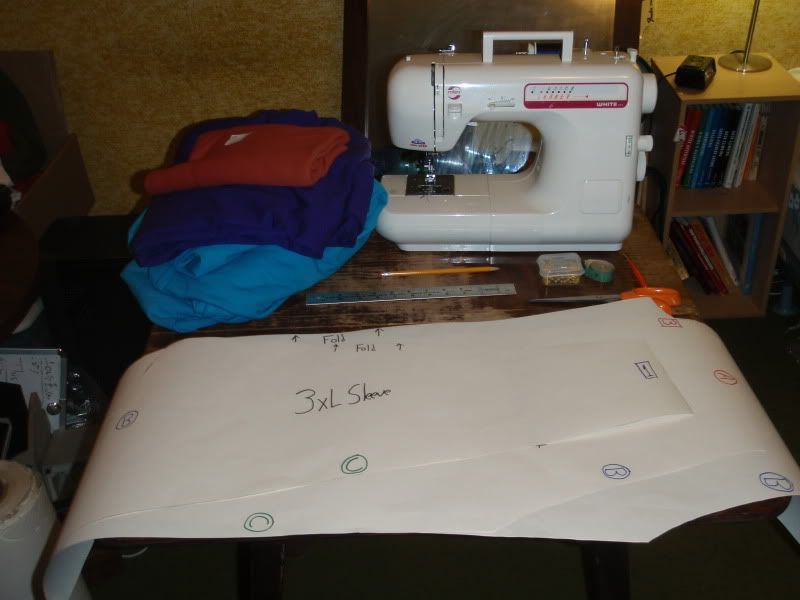
Here’s a visual aid(some things
aren’t pictured but you get the general idea):
PROCEDURE:
Note: I am using one of my homemade
patterns. At the end of the tutorial I will put up some info about the patterns
that I made and some info about if you wanna buy one. If you are not using a
pattern, this will be helpful for you nonetheless for the general concept, but
you will need to find something you want to trace and all that jazz and your procedure
will be a little different as far as getting your fabric cut out. I HIGHLY
recommend using a pattern, it’s SO much easier. Anyways, let’s move on:
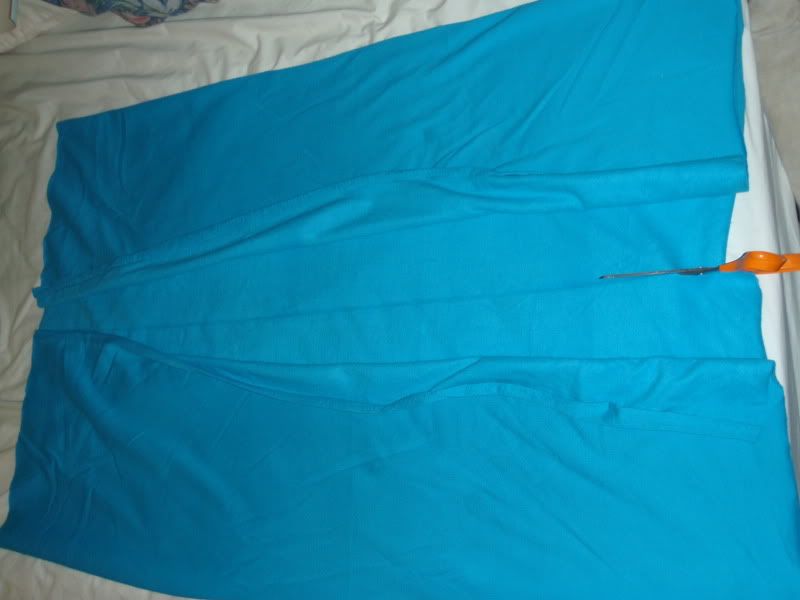
1. The
first thing you want to do is grab your fabric and fold each lateral edge into
the middle so that you have two equal sides with a fold on each edge and pin
the ends so they wont move. That’s really hard to put into words so bear with
me and refer to the following picture:

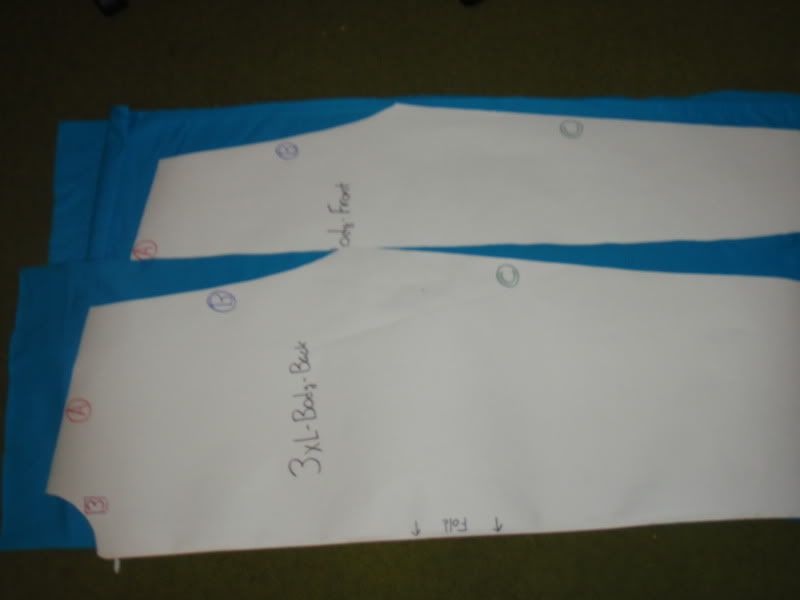
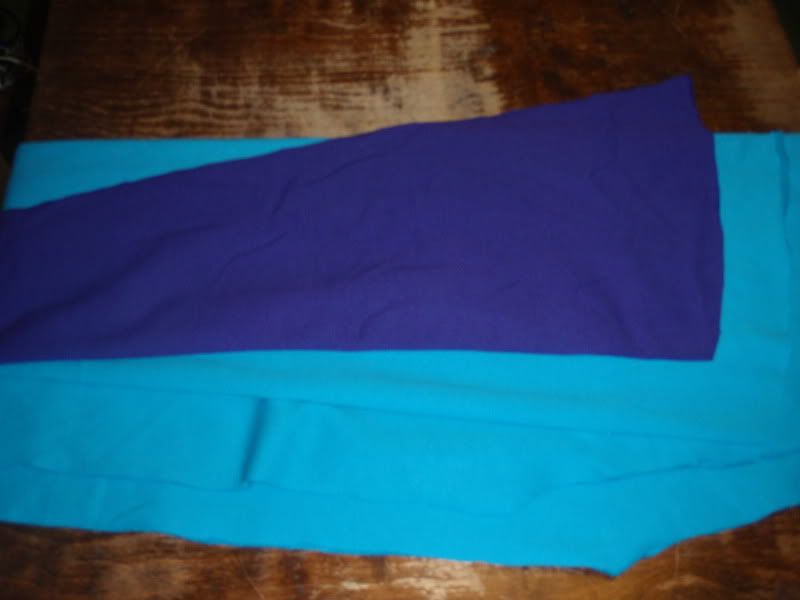
2. Next
you are going to want to lay your body patterns down so that you can cut the
appropriate length from your mass of fabric. Place them like in the next pic
and then cut the entire area off with a couple extra inches of comfort room so
you don’t accidentally cut too little:
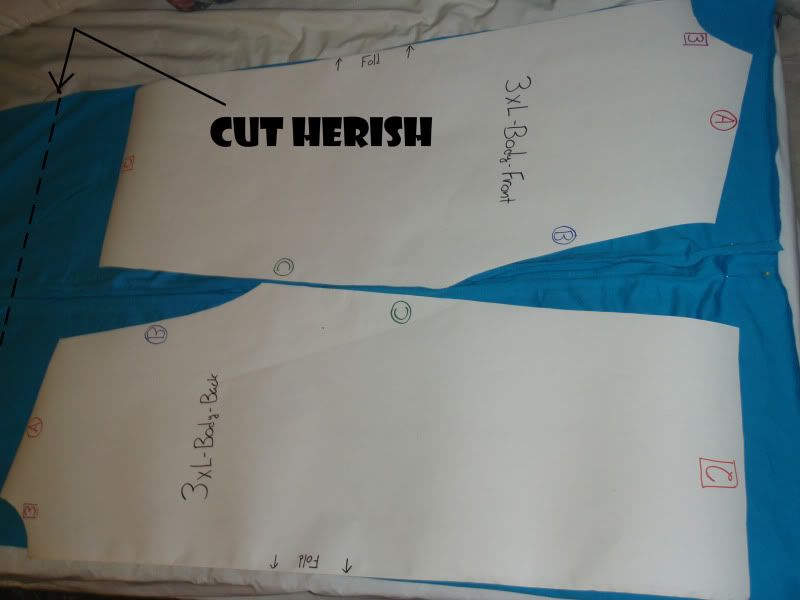
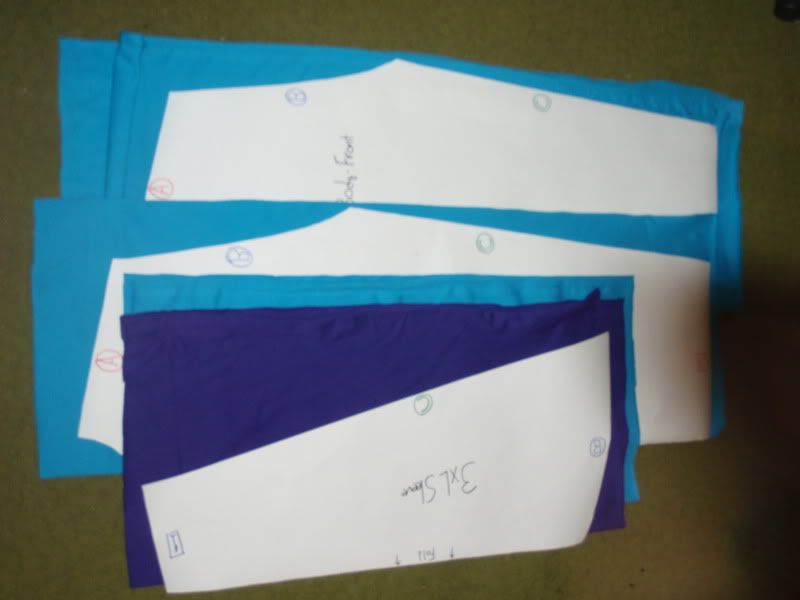
3. Next
you will cut this large piece in half, so that each body pattern has it’s own
piece. **double and triple check to make sure that the pieces are as close to
even as possible and have enough surface are for the pattern to cover because
you don’t want to accidentally cut one that is too small for your pattern**
So now each pattern has it’s own piece
of folded fabric.
Do the same thing
for the each sleeve and now you have a big pile of folded rectangles:
4. So
now you are going to pin each pattern to it’s piece of fabric so that you can
cut around the pattern without it moving:
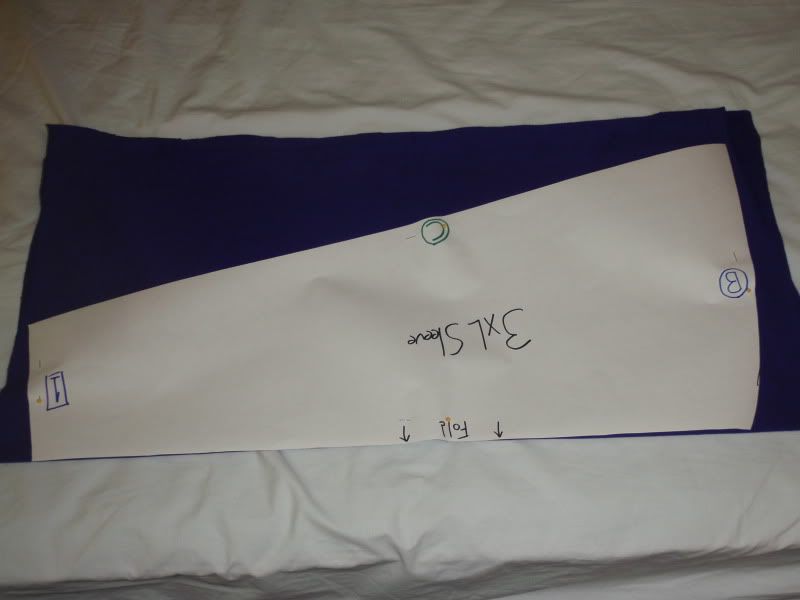
You don’t need too many, and make sure that you have to fold in the
correct spot(my patterns have it labeled as shown).
5. Now
you can cut around the pattern for each element of the garment and you will be
left with a pile of folded fabric that is starting to look like it may one day
be something wearable:
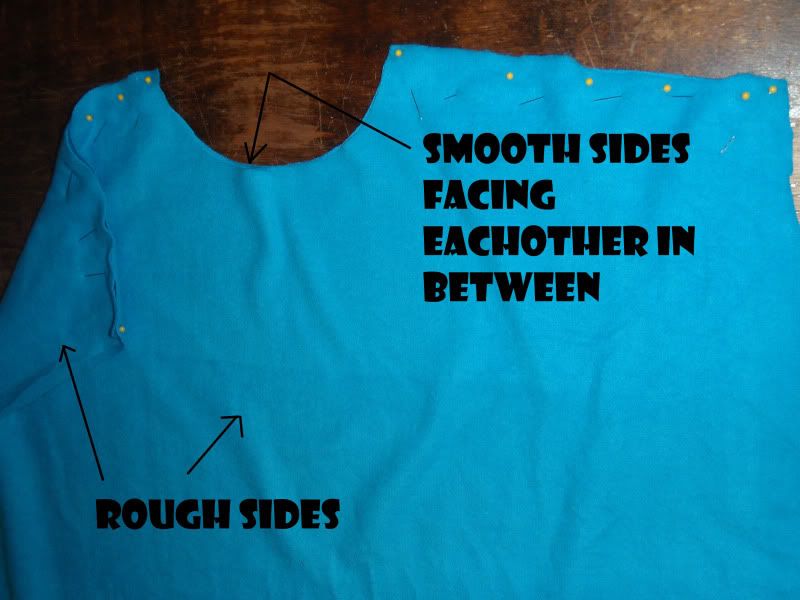
6. SEWING
THE BODY PIECES TOGETHER: The fabric that you are using most likely has a
smooth side and a rougher side. You want the smooth side to be out on the
finished product and you also want nice, smooth, low profile seams. The way you
achieve this is when you are sewing a seam, you have the garment “inside out.”
So in order to prep for sewing the body pieces together you need to pin them
together at the appropriate spots but MAKE SURE THAT YOU HAVE THE SMOOTH SIDES
TOUCHING EACHOTHER AND THAT THE “ROUGH” SIDES ARE FACING OUT TOWARDS YOU AND
THE TABLE otherwise you will end up with a disaster, and you don’t want that.
Refer to picture:
When pinning
fabric, I like to pin each end first and then fill in. Also, pin them in such a
way so that, as you are sewing, you can easily take them out.
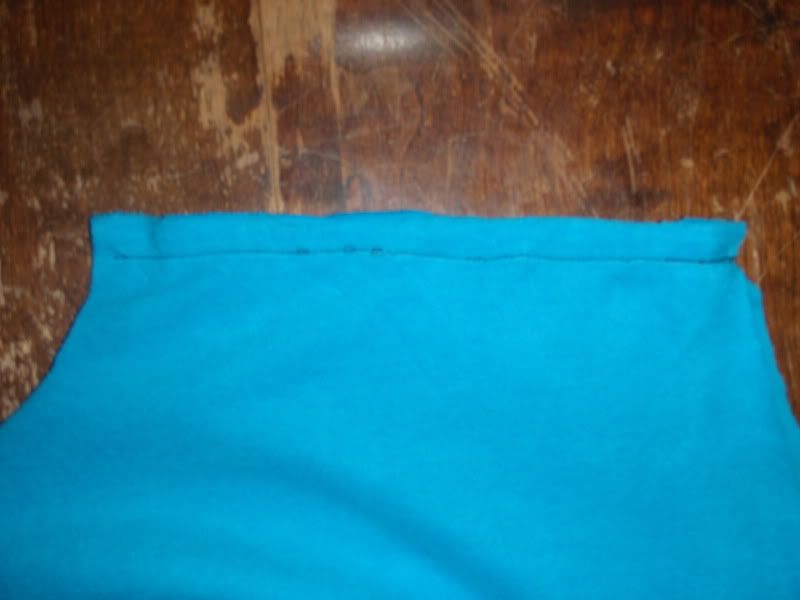
7. SEWING
TIME YAY!: So now you are ready to sew. I won’t get into details because I
assume you are a semi-competent sewer but a few things to remember are: don’t
forget to lock your ends with a backstitch, stay on the correct seam allowance
mark while sewing or it will end up crooked and make you sad L,
and finally TAKE YOUR DAMN TIME ITS NOT A RACE. So once you’re done sewing the
body pieces together it should look a little like the(this is just one side,
you have to do this twice)
8. PREPPING
AND SEWING THE ARM TO THE SHOULDER OF THE BODY: Now you’re ready to get the
arms on. Open up your body(the thing you just sewed) and lay it on the table
smooth side up. So for this seam, it’s not gonna be sewing in a straight line,
so you will need to take extra care whilst pinning and sewing it. Take the arm
and put its smooth side against the smooth side of the body piece(smooth side
of arm down). Match up and pin each corner and then find the middle of the
sleeve end and match and pin that up with the edge of the seam that you sewed
previously. Now you can start pinning in between, making sure everything is
match up nicely and you’ll end up like this:
(sorry the pic is terrible) Now you can sew this piece on. Go
slowly and be careful. Also, make sure that as you are sewing you keep both
pieces aligned with one another and stretched flat before they are stitched. Do
that for both sleeves.
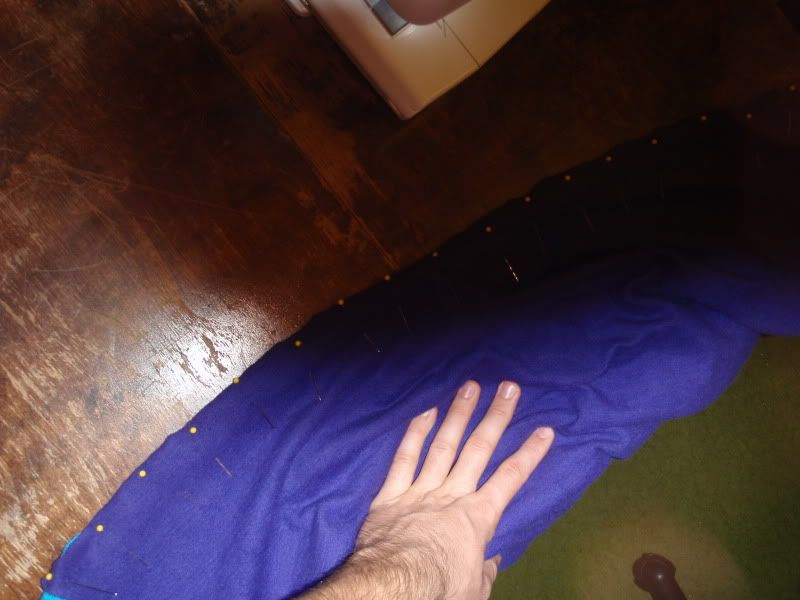
9. PREPPING
AND SEWING THE SIDE SEAM: So now you have a funny looking double cape with a
neck hole; time to sew up the side and sleeves, all in one seam. Start pinning
at the sleeve and pin it all the way to the arm pit. Now as I’m sure you
noticed, the back panel and front panel of the body are not the same length.
The back is a bit longer, which is true for most clothing items. To pin this,
start by pinning the two bottom corners together and then pull on the armpit pin
and the end you just pinned so that the shorter piece stretches to match the
longer. Find the middle and pin there. Do the same thing, stretch the material
between two pins and pin the middle, until it has been sufficiently pinned like
so:
As for the actual sewing, the
arm is very straight forward(literally). Once you get to the arm pit, make sure
the needle is through the fabric, lift the foot, pivot the correct angle, and
put the foot back down. When Sewing down the body(the blue part in the picture
above), you will need to go slowly and make sure that you are keeping tension
on the material that is being sewn. This is because, as was said before, the
pieces are not of equal length so the shorter one must be stretched in order to
match the longer one. You want the stretch to be as even as possible so pull
your pins at the last possible moment as they feed in. Do this for both sides
and now you have a fashionable fitted snuggy for lounging round the house with:
But you wanna take this to the
slopes don’t you??? Well then you’re gonna need some ribbed cuffs, waistband,
and neckband there chief.
10. RIBBING
CUT AND PREP: To put it crassly, ribbing is a bitch. It takes a bit to get a
hang of sewing it and to just wrap your head around how putting it on works. It
also takes some trial and error to figure out how much to use for a certain
size opening. Here is what I use for my patterns to either give you a reference
point for your own creation or if you are using my patterns, it’s what fits the
best:
Waistband
= 41 5/8” x 7 5/8”
Cuff
= 10 1/8” x 5 5/8”
Neckband
=19 5/8” x 3 1/8”
These
dimensions are to be used with unfolded ribbing(not tube knit) and account for
a 5/8” seam allowance.
So
use your tools and cut all of these piece out(2 cuffs by the way, don’t forget)
and you’ve got this:
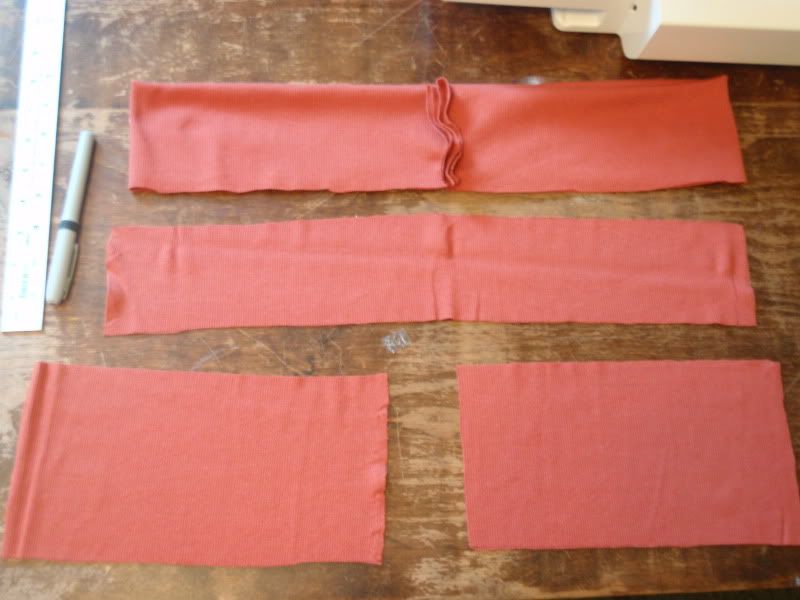
The top one
is the waistband which is already done(sorry I got ahead of myself a bit) but
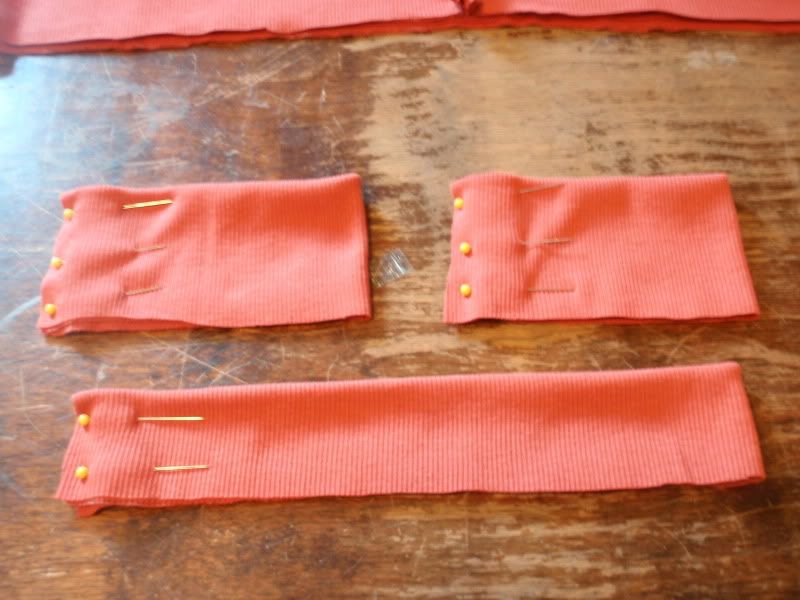
the bottom three are what you start out with. So in order to get the ribbing
all prepped for sewing, first fold it in half the short way like so:
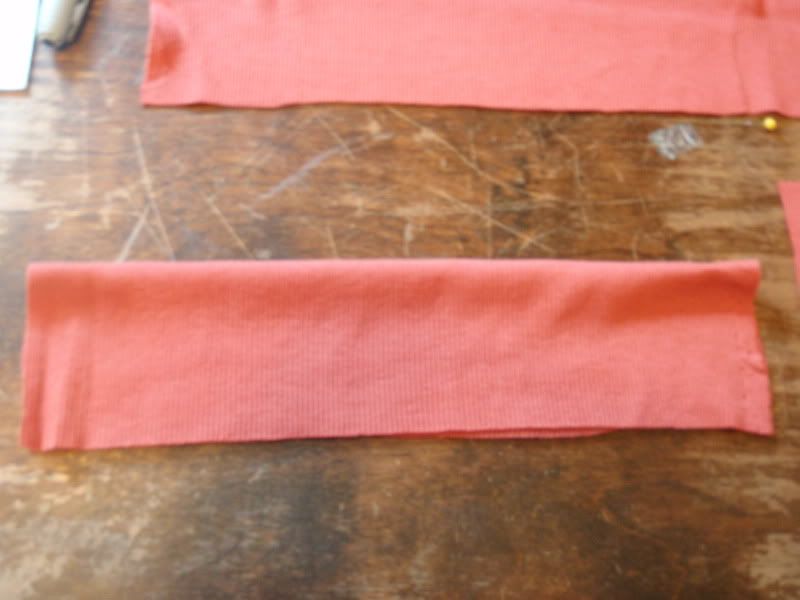
Next fold it in half the long way
and pin the ends together like so:

I
like to do this for all of them before starting to sew(waistband not pictured,
because it’s already finished):
So
now just sew each end that you have pinned together using the 5/8” seam
allowance and viola! You have all of the ribbing elements ready for attachment.
I like to cut off the extra material left by the seam allowance as well as you
can see in the next picture:
11. SEWING
ON THE RIBBING ELEMENTS: Now that you have all your ribbing accent pieces made,
it’s time to pin and sew. Ribbing has elastic properties which is why we use it
for cuffs and such, so that it hugs us and makes our clothes look perdy and
fitted. Because we want this cinching effect, we size ribbing smaller than the
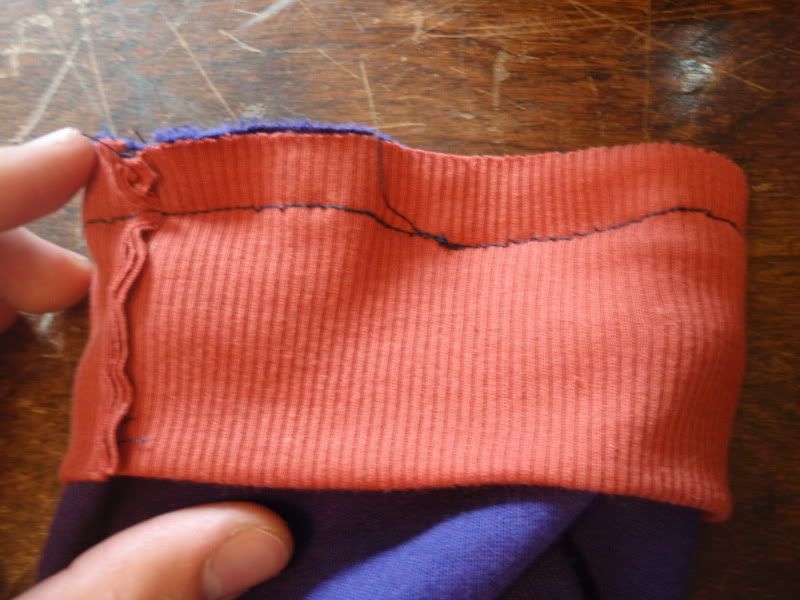
opening we are sewing it to. The first thing we will do is a cuff to show you
the concept behind attaching ribbing. First, grab your snuggie looking thing
and make sure its smooth side out(like it is going to be worn). Take the end of
the arm (wrist) and pull one of your cuffs over it, inside out, so that the
rough seam is showing. If you do this incorrectly you will end up with the
rough seem on the outside when you turn it out after sewing, which sucks
because you have to rip it out and do it over:
Now, match up the rough seam
with the seam of the wrist and pin it. Then stretch the cuff out to match the
wrist’s diameter with your hand and find the opposite corner and pin there. Do
this stretching and pining thing until you have pinned it in 4 times, with
equal spacing between each pin and you get this:
Now its time to sew this thing. This method is gonna depend
heavily on your sewing machine but it has worked with the 2 different machines
that I have used. Many machines have an accessory storage thing on the front
which you can take off and then you can pull the cuff over the bottom part and
then carefully sew it on. You probably have no clue what I’m talking about,
here’s a pic(from a different sweatshirt):
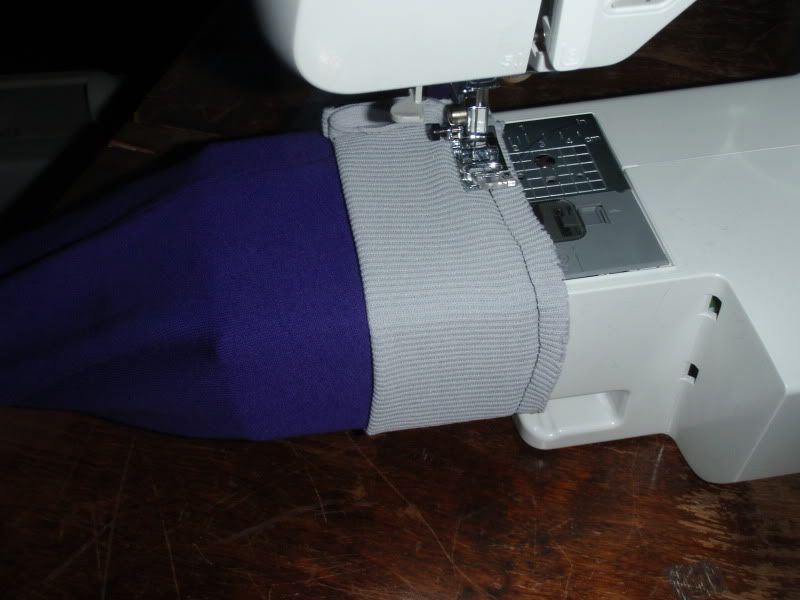
This part can be tricky. You need to physically turn the wrist
around the machine because it’s pretty tightly on there and the feeder
mechanism needs some help. Once that’s all sewed you now have this:
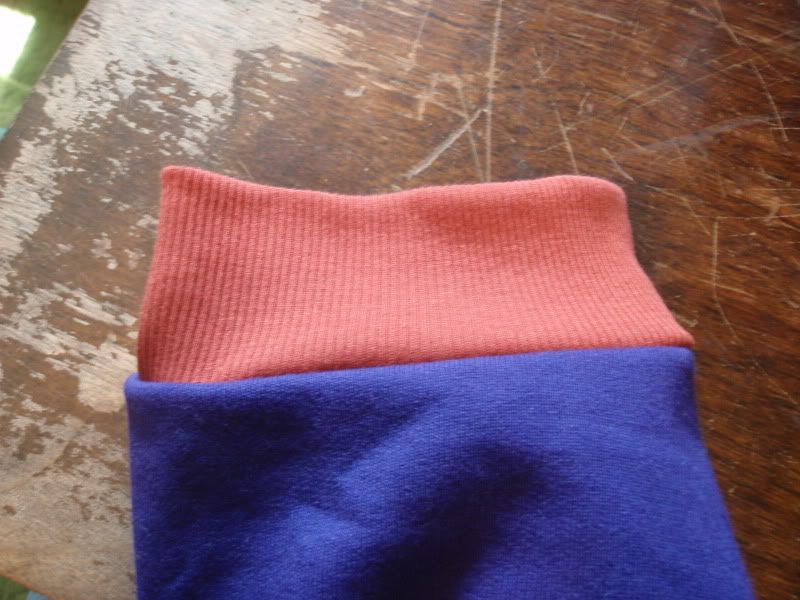
Now all you do is turn the cuff
inside out and now you have a sleek, smooth, comfy cuff:
After you put the cuffs on, the waist and neck bands are
next. Pinning these doesn’t take many pins so don’t spend a bunch of time
pinning for no reason. Here’s the fully pinned waist:
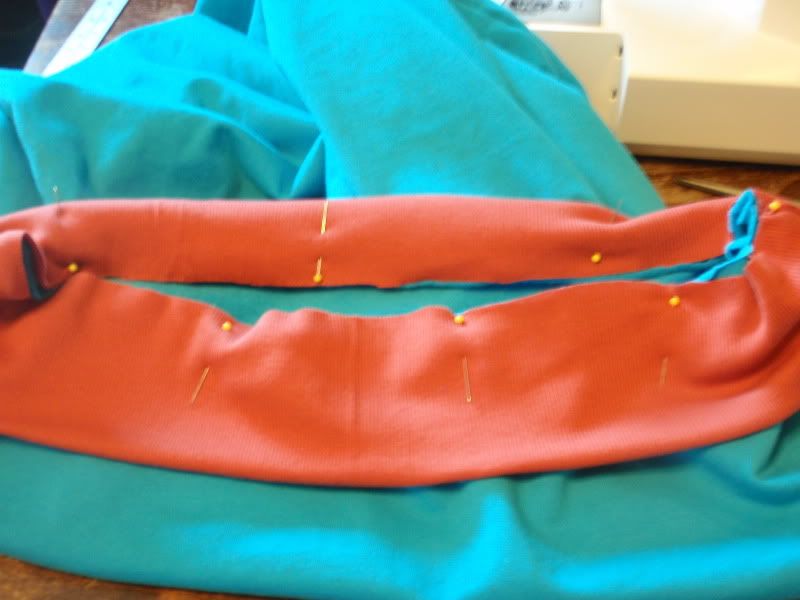
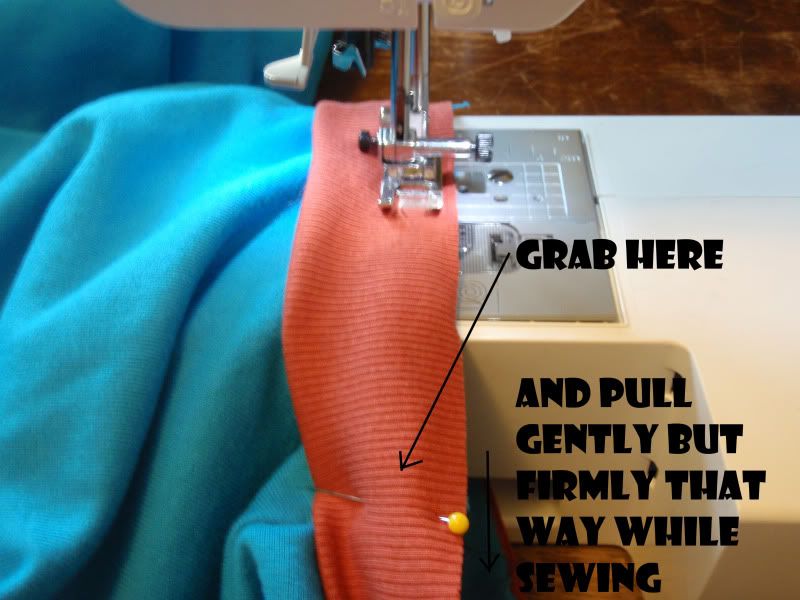
It only takes a few of them. The thing is when sewing the
waist and neck, you have to keep the ribbing stretched out to match the
sweatshirt fabric so that it has an even stretch:
Once you put all the ribbing on, you’re done!!!
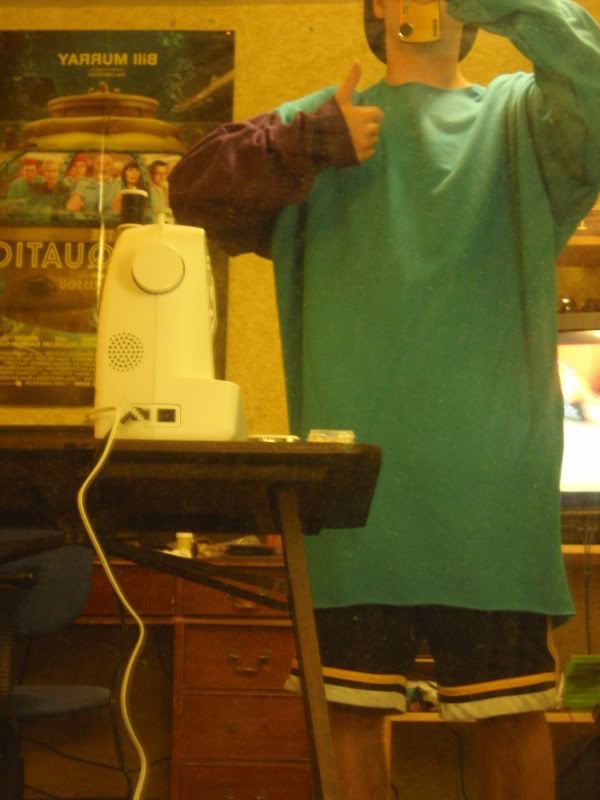
12. FLOSS
YOUR NEW GARMENT: Now that you’re sweatshirt is complete, you are stoked out of
your mind and grab your camera and head to the nearest large mirror to take
pictures for newschoolers!!!!!111one111!!!!

Once you have mastered the crew, you can do all sorts of zany things
like hoods, zippers, pockets, crazy designs, and whatever else you wanna do.
Also, with your fabric scraps you can make facemasks, neckwarmers, headbands,
and all sorts of crap. AWESOME!!
IN CONCLUSION: I hope this was helpful to those
who’ve been asking for a tutorial for awhile. I’m sorry if parts were not well
explained or clear, feel free to ask me about whatever and I would love to
help. I feel like there weren’t enough
pictures so I hope to revise this at a later date with a crap ton more pictures
cause it’s much easier to show these things visually than to attempt to convey
them in words.
REGARDING PATTERNS AND CREWS FOR SALE: As for the
patterns I used and am producing, I will have a thread up in probably a week or
so with all the details on those. They come in XLT XXLT and XXXLT and I will
have pics of examples of each size and all the measurements in that thread. PM
me if you are interested, but basically just wait for the next thread. I will
also have an assortment of crewnecks that I have made/am making for sale in
that thread and would be willing to do custom ones for people. I have a bunch
of hospital/school bills that I need to pay off so I’d love to make you
something. The only thing with that is
that I’m heading back to UVM soon; I am bringing my sewing stuff, but
school is
a busy time so anything custom would take a little while cause of school
busy-ness and fabric shipping times and such. Also I just got a possible
order of 25 sweatshirts for someone and their crew, and if that ends up
happening, it may be awhile til I can get to yours, but just contact me
regardless.
Thanks for looking and happy sewing!
In this thread I will be showing in a step-by-step
format, how to make a crew neck sweatshirt from scratch. This is not a sewing
tutorial. If you don’t know how to sew there are a million tutorials online so
do a google search and get learned. Let’s
get started shall we?
THE DESIGN: So obviously you’re going to want to
have some foresight as to what you’re gonna make. Here’s a nifty little blank that
you can use paint bucket on to preview and brainstorm ideas:
Poptart sweatshirt for Mr. James Amodeo (jamodeo):
WHAT YOU WILL NEED:
- Sewing machine that you are familiar
with and that is setup and ready to go.
- [endif]Sharp Scissors
- A ruler and measuring tape
- [endif]A seam ripper(to use if you mess
something up, which you probably will your first time)
- Pins
- [endif]A pencil, pen, sharpie or all three
preferably(for marking stuff)
- [endif]2 to 2.5 yards of sweatshirt fabric,
depending on how big you want it. If you want different color sleeves and all
that jazz, half a yard equals about one sleeve or about one body panel (front
or back).
- ½ yard of ribbing(rib knit fabric its
sometimes called)
- A pattern or something that you would
like to trace.
- Background entertainment. Tv or music.
You will be here awhile(first one took me 4+ hours) so make it comfy.
- [endif]A big table free of debris
Here’s a visual aid(some things
aren’t pictured but you get the general idea):
PROCEDURE:
Note: I am using one of my homemade
patterns. At the end of the tutorial I will put up some info about the patterns
that I made and some info about if you wanna buy one. If you are not using a
pattern, this will be helpful for you nonetheless for the general concept, but
you will need to find something you want to trace and all that jazz and your procedure
will be a little different as far as getting your fabric cut out. I HIGHLY
recommend using a pattern, it’s SO much easier. Anyways, let’s move on:
1. The
first thing you want to do is grab your fabric and fold each lateral edge into
the middle so that you have two equal sides with a fold on each edge and pin
the ends so they wont move. That’s really hard to put into words so bear with
me and refer to the following picture:
2. Next
you are going to want to lay your body patterns down so that you can cut the
appropriate length from your mass of fabric. Place them like in the next pic
and then cut the entire area off with a couple extra inches of comfort room so
you don’t accidentally cut too little:
3. Next
you will cut this large piece in half, so that each body pattern has it’s own
piece. **double and triple check to make sure that the pieces are as close to
even as possible and have enough surface are for the pattern to cover because
you don’t want to accidentally cut one that is too small for your pattern**
So now each pattern has it’s own piece
of folded fabric.
Do the same thing
for the each sleeve and now you have a big pile of folded rectangles:
4. So
now you are going to pin each pattern to it’s piece of fabric so that you can
cut around the pattern without it moving:
You don’t need too many, and make sure that you have to fold in the
correct spot(my patterns have it labeled as shown).
5. Now
you can cut around the pattern for each element of the garment and you will be
left with a pile of folded fabric that is starting to look like it may one day
be something wearable:
6. SEWING
THE BODY PIECES TOGETHER: The fabric that you are using most likely has a
smooth side and a rougher side. You want the smooth side to be out on the
finished product and you also want nice, smooth, low profile seams. The way you
achieve this is when you are sewing a seam, you have the garment “inside out.”
So in order to prep for sewing the body pieces together you need to pin them
together at the appropriate spots but MAKE SURE THAT YOU HAVE THE SMOOTH SIDES
TOUCHING EACHOTHER AND THAT THE “ROUGH” SIDES ARE FACING OUT TOWARDS YOU AND
THE TABLE otherwise you will end up with a disaster, and you don’t want that.
Refer to picture:
When pinning
fabric, I like to pin each end first and then fill in. Also, pin them in such a
way so that, as you are sewing, you can easily take them out.
7. SEWING
TIME YAY!: So now you are ready to sew. I won’t get into details because I
assume you are a semi-competent sewer but a few things to remember are: don’t
forget to lock your ends with a backstitch, stay on the correct seam allowance
mark while sewing or it will end up crooked and make you sad L,
and finally TAKE YOUR DAMN TIME ITS NOT A RACE. So once you’re done sewing the
body pieces together it should look a little like the(this is just one side,
you have to do this twice)
8. PREPPING
AND SEWING THE ARM TO THE SHOULDER OF THE BODY: Now you’re ready to get the
arms on. Open up your body(the thing you just sewed) and lay it on the table
smooth side up. So for this seam, it’s not gonna be sewing in a straight line,
so you will need to take extra care whilst pinning and sewing it. Take the arm
and put its smooth side against the smooth side of the body piece(smooth side
of arm down). Match up and pin each corner and then find the middle of the
sleeve end and match and pin that up with the edge of the seam that you sewed
previously. Now you can start pinning in between, making sure everything is
match up nicely and you’ll end up like this:
(sorry the pic is terrible) Now you can sew this piece on. Go
slowly and be careful. Also, make sure that as you are sewing you keep both
pieces aligned with one another and stretched flat before they are stitched. Do
that for both sleeves.
9. PREPPING
AND SEWING THE SIDE SEAM: So now you have a funny looking double cape with a
neck hole; time to sew up the side and sleeves, all in one seam. Start pinning
at the sleeve and pin it all the way to the arm pit. Now as I’m sure you
noticed, the back panel and front panel of the body are not the same length.
The back is a bit longer, which is true for most clothing items. To pin this,
start by pinning the two bottom corners together and then pull on the armpit pin
and the end you just pinned so that the shorter piece stretches to match the
longer. Find the middle and pin there. Do the same thing, stretch the material
between two pins and pin the middle, until it has been sufficiently pinned like
so:
As for the actual sewing, the
arm is very straight forward(literally). Once you get to the arm pit, make sure
the needle is through the fabric, lift the foot, pivot the correct angle, and
put the foot back down. When Sewing down the body(the blue part in the picture
above), you will need to go slowly and make sure that you are keeping tension
on the material that is being sewn. This is because, as was said before, the
pieces are not of equal length so the shorter one must be stretched in order to
match the longer one. You want the stretch to be as even as possible so pull
your pins at the last possible moment as they feed in. Do this for both sides
and now you have a fashionable fitted snuggy for lounging round the house with:
But you wanna take this to the
slopes don’t you??? Well then you’re gonna need some ribbed cuffs, waistband,
and neckband there chief.
10. RIBBING
CUT AND PREP: To put it crassly, ribbing is a bitch. It takes a bit to get a
hang of sewing it and to just wrap your head around how putting it on works. It
also takes some trial and error to figure out how much to use for a certain
size opening. Here is what I use for my patterns to either give you a reference
point for your own creation or if you are using my patterns, it’s what fits the
best:
Waistband
= 41 5/8” x 7 5/8”
Cuff
= 10 1/8” x 5 5/8”
Neckband
=19 5/8” x 3 1/8”
These
dimensions are to be used with unfolded ribbing(not tube knit) and account for
a 5/8” seam allowance.
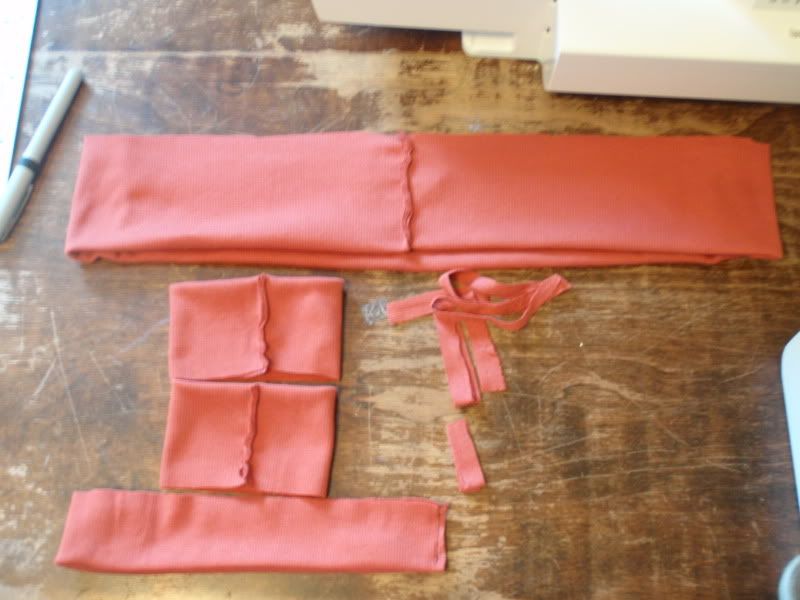
So
use your tools and cut all of these piece out(2 cuffs by the way, don’t forget)
and you’ve got this:
The top one
is the waistband which is already done(sorry I got ahead of myself a bit) but
the bottom three are what you start out with. So in order to get the ribbing
all prepped for sewing, first fold it in half the short way like so:
Next fold it in half the long way
and pin the ends together like so:
I
like to do this for all of them before starting to sew(waistband not pictured,
because it’s already finished):
So
now just sew each end that you have pinned together using the 5/8” seam
allowance and viola! You have all of the ribbing elements ready for attachment.
I like to cut off the extra material left by the seam allowance as well as you
can see in the next picture:
11. SEWING
ON THE RIBBING ELEMENTS: Now that you have all your ribbing accent pieces made,
it’s time to pin and sew. Ribbing has elastic properties which is why we use it
for cuffs and such, so that it hugs us and makes our clothes look perdy and
fitted. Because we want this cinching effect, we size ribbing smaller than the
opening we are sewing it to. The first thing we will do is a cuff to show you
the concept behind attaching ribbing. First, grab your snuggie looking thing
and make sure its smooth side out(like it is going to be worn). Take the end of
the arm (wrist) and pull one of your cuffs over it, inside out, so that the
rough seam is showing. If you do this incorrectly you will end up with the
rough seem on the outside when you turn it out after sewing, which sucks
because you have to rip it out and do it over:
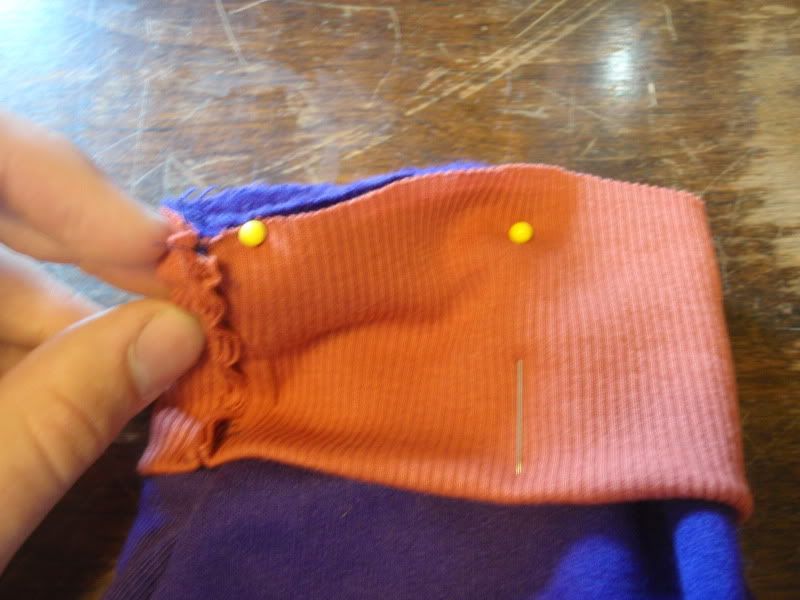
Now, match up the rough seam
with the seam of the wrist and pin it. Then stretch the cuff out to match the
wrist’s diameter with your hand and find the opposite corner and pin there. Do
this stretching and pining thing until you have pinned it in 4 times, with
equal spacing between each pin and you get this:
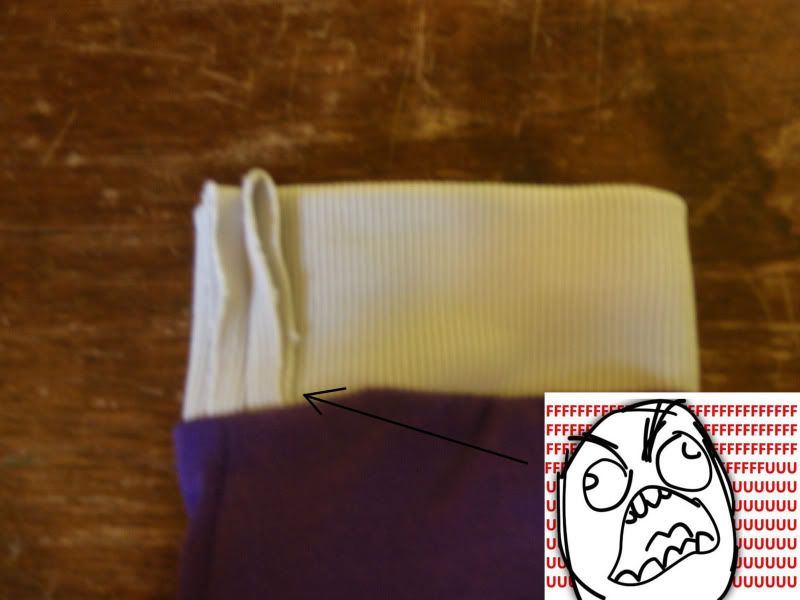
Now its time to sew this thing. This method is gonna depend
heavily on your sewing machine but it has worked with the 2 different machines
that I have used. Many machines have an accessory storage thing on the front
which you can take off and then you can pull the cuff over the bottom part and
then carefully sew it on. You probably have no clue what I’m talking about,
here’s a pic(from a different sweatshirt):
This part can be tricky. You need to physically turn the wrist
around the machine because it’s pretty tightly on there and the feeder
mechanism needs some help. Once that’s all sewed you now have this:
Now all you do is turn the cuff
inside out and now you have a sleek, smooth, comfy cuff:
After you put the cuffs on, the waist and neck bands are
next. Pinning these doesn’t take many pins so don’t spend a bunch of time
pinning for no reason. Here’s the fully pinned waist:
It only takes a few of them. The thing is when sewing the
waist and neck, you have to keep the ribbing stretched out to match the
sweatshirt fabric so that it has an even stretch:
Once you put all the ribbing on, you’re done!!!
12. FLOSS
YOUR NEW GARMENT: Now that you’re sweatshirt is complete, you are stoked out of
your mind and grab your camera and head to the nearest large mirror to take
pictures for newschoolers!!!!!111one111!!!!
Once you have mastered the crew, you can do all sorts of zany things
like hoods, zippers, pockets, crazy designs, and whatever else you wanna do.
Also, with your fabric scraps you can make facemasks, neckwarmers, headbands,
and all sorts of crap. AWESOME!!
IN CONCLUSION: I hope this was helpful to those
who’ve been asking for a tutorial for awhile. I’m sorry if parts were not well
explained or clear, feel free to ask me about whatever and I would love to
help. I feel like there weren’t enough
pictures so I hope to revise this at a later date with a crap ton more pictures
cause it’s much easier to show these things visually than to attempt to convey
them in words.
REGARDING PATTERNS AND CREWS FOR SALE: As for the
patterns I used and am producing, I will have a thread up in probably a week or
so with all the details on those. They come in XLT XXLT and XXXLT and I will
have pics of examples of each size and all the measurements in that thread. PM
me if you are interested, but basically just wait for the next thread. I will
also have an assortment of crewnecks that I have made/am making for sale in
that thread and would be willing to do custom ones for people. I have a bunch
of hospital/school bills that I need to pay off so I’d love to make you
something. The only thing with that is
that I’m heading back to UVM soon; I am bringing my sewing stuff, but
school is
a busy time so anything custom would take a little while cause of school
busy-ness and fabric shipping times and such. Also I just got a possible
order of 25 sweatshirts for someone and their crew, and if that ends up
happening, it may be awhile til I can get to yours, but just contact me
regardless.
Thanks for looking and happy sewing!