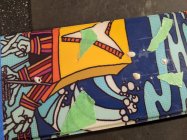
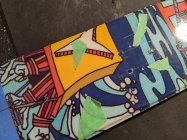
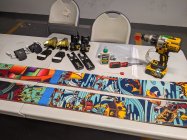
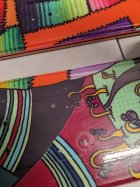
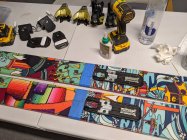
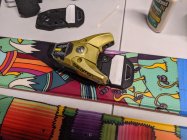
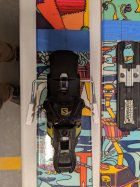
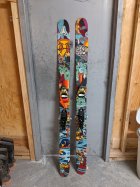
First time mounting my own skis. Watch me succeed or fail.

Eightsails

Member
Second mount on these skis. Going to mount STH2 16s I took off a different pair.

Part 1: Measuring on my lunch break.

Started taking photos after step 3, but re-creating to show my process.

1) I measured tip to tip to find true center, luckily the graphic line was perfectly lined up with my measurements so I measured back from there to the Team line at -2.5cms.

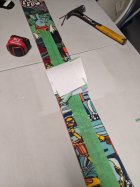
1.5) (Probably skip this step) I wrapped a piece of blue masking tape so the top line of the tape was in line with my mount line.

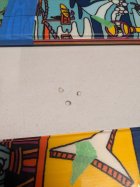
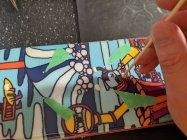
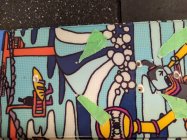
2) Then I laid out a piece of green tape approx centerline of the ski to mark on later.

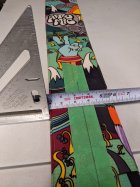
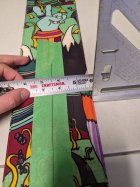
3) Using a tape measure and speed-square, lined up the 1" mark to one edge and holding the tape so no movement, flipped the square over to get the width dimension. (Tried to keep the tape perpendicular to the ski) Photos look a bit wack, but its a re-creation one-handed.
1022167.jpeg

1022168.jpeg

4) Took the full width, divided by 2 and mark with pencil.

5) Re-checked by measuring with a tape to my mark from both sides edges.

6) Did this 3 times on each ski, one around mount line and 2 towards tip and tail, past where my bindings should end by a few inches.

7) Re-checked all my marks like 6 more times, Within my tolerances.

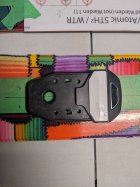
8) Used this piece of metal I had at work to mark a straight line down through my 3 marks. You might be able to use a ruler or something more reasonable but I liked this metal plate.

1022169.jpeg

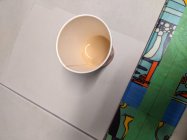
9) Had some coffee. Was my lunch break after all.
1022170.jpeg

10) Printed out a STH2 Template I found on TGR (Reminder to not just pick the ones on the first page of their mount as some are out of date - aka the Salomon one). Took 30 seconds of digging. **Took three prints to figure out how to COMPLETELY turn off scaling to the paper, had to run it through Bluebeam print to remove it completely. Windows made this more difficult than it should have been (Default scaling is not 'no' scaling)
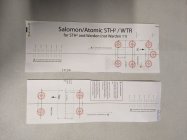
1022172.jpeg

11) Checked template with ruler and physically putting the binding pieces on the marks to see the centerline in the holes.
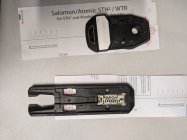
1022173.jpeg

12) Brought my boot to work so Grabbed the BSL right off the boot.

1022174.jpeg

13) Folded the paper templates at the 310mm mark and used some scissors to cut a small triangle window.
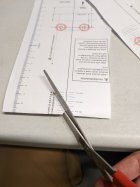
1022175.jpeg

14) Unfolded the back template and put the window right over the mount line on my skis, lining up the centerline as well. When its all nice and true, taped it in place.

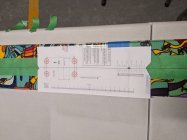
1022177.jpeg

1022178.jpeg

1022179.jpeg

15) Repeated with the front template, putting the window over the first to see the lines below. Taped in place.

1022181.jpeg

16) Another repeat with the second ski.
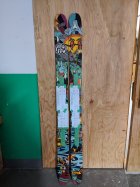
1022180.jpeg

17) Measuring done, little over my 30 min break.

Part 2 when I mount maybe after work today if I can find my screwdriver, otherwise tomorrow.

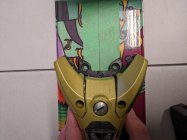
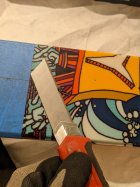
Bonus: On coffee break I took an OLFA knife and trimmed off some old glue residue on the binding plates and screws, just so they're a little cleaner and ready for re-use.
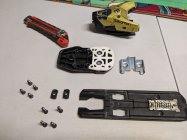
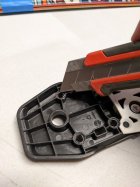
1022182.jpeg

1022183.jpeg
 
Part 2: Almost drilling.

2.1) Couldn't find a punch, so I grabbed a screw and duplex nail for my "Hole punch".

1022209.jpeg

2.2) First screw to make the accurate point with a couple of firm whacks, then the duplex nail in the divot to make a more serious mark.

1022210.jpeg

2.3) Once the punching was done on all 8 holes, pulled back the template and busted out the tapemeasure again, checking dimensions to the holes on the raw ski / masking tape.
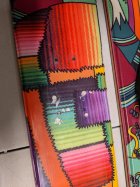
1022211.jpeg

1022212.jpeg

2.4) Confirmed all the points were symmetrical to the ski edges, pulled back the tape, and took a look how close the previous holes were. I knew they would be close, but I'm not too worried.
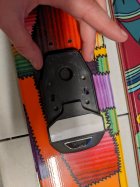
2.5) Pulled off the full masking tape, and put a few pieces by the punches. Re-checked the punches fit inside the binding holes.

1022213.jpeg

1022214.jpeg

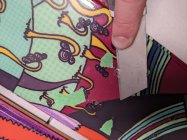
2.6) Prepping the old holes. Cut down the existing volcanos with the OLFA knife, trimming them down as flush as possible to the topsheet. Ended up with a few little plastic donuts.

1022215.jpeg

1022216.jpeg

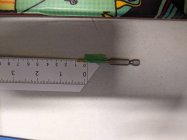
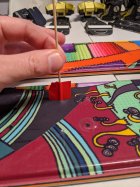
2.7) Found my 1/8" drill bit, and measured 9mm from the tip using a fancy pants printed ruler cause I needed metric. Threw a piece of tape on at the 9mm mark, and test put it into the existing holes to double check length. Was pretty good.

1022217.jpeg

2.8) Predrill in the punches just on the surface level. Want to keep my marks visible, but wont drill until I fill the existing holes with some wood glue and dowels from the shop tonight. I'm off to get some wider brakes for the Benchetlers.

1022219.jpeg

1022220.jpeg

Final hole fill, drill and gluing tomorrow. See you then.

Question; Is this wood glue sufficient or should i pick something else up?

1022218.jpeg
 
Use marine epoxy. One other piece of advice would to use a drill guide so you drill straight down. Other than that you're gold. Also calipers are an easier way to get a center line as opposed to a tape.

There's actually a descent amount of fibbing room. People always make this way harder than it has to be.
 
14363201:elm. said:
Use marine epoxy. One other piece of advice would to use a drill guide so you drill straight down. Other than that you're gold. Also calipers are an easier way to get a center line as opposed to a tape.

There's actually a descent amount of fibbing room. People always make this way harder than it has to be.

I'm probably going to remount the bindings in a year or two to some reckoner 122s, this is more a proof of concept for myself so I can rip some wides around this year.

So I'm not entirely sure I should use epoxy, since I'll be taking them out again, but I only found the titebond 2, not 3, which most people recommend. I'll go buy some TB3 if I need but trying to not spend any money haha
 
14363221:Eightsails said:
I'm probably going to remount the bindings in a year or two to some reckoner 122s, this is more a proof of concept for myself so I can rip some wides around this year.

So I'm not entirely sure I should use epoxy, since I'll be taking them out again, but I only found the titebond 2, not 3, which most people recommend. I'll go buy some TB3 if I need but trying to not spend any money haha

Idk if you need the reckoners dude, after you ski the bent chetlers you will know...

1022257.jpeg
 
Had these since 2013 skiing on a frame touring binding. They were an art piece in my room the last 2 years. I think once I've had them for a decade I'll try something newer on pow days haha.

I see you're also a man of style and class.

14363248:betz said:
Idk if you need the reckoners dude, after you ski the bent chetlers you will know...

View attachment 1022257
 
A lot of people don’t suggest epoxy because it creates separation between the wood and screw, it expands, and it’s hard to remove screws. Wood glue is the move. I use Roo glue myself. I bought tiny bottle from Tognar but you can buy bigger bottles elsewhere

14363221:Eightsails said:
I'm probably going to remount the bindings in a year or two to some reckoner 122s, this is more a proof of concept for myself so I can rip some wides around this year.

So I'm not entirely sure I should use epoxy, since I'll be taking them out again, but I only found the titebond 2, not 3, which most people recommend. I'll go buy some TB3 if I need but trying to not spend any money haha
 
14363251:Eightsails said:
Had these since 2013 skiing on a frame touring binding. They were an art piece in my room the last 2 years. I think once I've had them for a decade I'll try something newer on pow days haha.

I see you're also a man of style and class.

Fair enough! I thought you were just mounting them and haven't ridden them yet. Sounds like they've been well loved and the reckoners are probably one of the closest thing to them out there.

I absolutely love these skis though and it's not like I haven't ridden newer skis before. Gonna ride them Friday-Sat back to back with some Moments Blister pros I just picked up, but I don't see the moments making me want to sell the BC's!
 
For any 3d printing dudes out there, the mounting process is super easy with 3d printed templates and a drill press. I print out the paper templates, cad up a model from the paper template with centering guides, use my 3dprinted center line tool, then drill. If anyone want more info ill be glad to shre
 
14363221:Eightsails said:
I'm probably going to remount the bindings in a year or two to some reckoner 122s, this is more a proof of concept for myself so I can rip some wides around this year.

So I'm not entirely sure I should use epoxy, since I'll be taking them out again, but I only found the titebond 2, not 3, which most people recommend. I'll go buy some TB3 if I need but trying to not spend any money haha

You can always just get new screws
 
Using any epoxy for ski mounting is never recommended. The wood glue you have is plenty sufficient.
 
14363261:BradFiAusNzCoCa said:
A lot of people don’t suggest epoxy because it creates separation between the wood and screw, it expands, and it’s hard to remove screws. Wood glue is the move. I use Roo glue myself. I bought tiny bottle from Tognar but you can buy bigger bottles elsewhere

Unfortunately in Canada I apparently have a very limited selection to adhesive and epoxy. Can only seem to find Gorilla Glue, Lepage, and JBweld in my area. My buddy has some titebond 3 at his house I might see if he can lend me for the bindings, and use some Marineweld with plastic plugs in the old holes.
 
14363396:.nasty said:
Using any epoxy for ski mounting is never recommended. The wood glue you have is plenty sufficient.

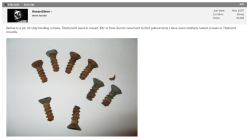
This photo does spook me a little. Might try to find the Titebond 3 nearby or borrow my friend's.

1022300.png
 
1022310.png

Yup titebond 3 is the way to go. Good stuff!

Also props on the best bentchetlers to be made. Owned a pair for 5+ years and always regret getting rid of them.
 
To find center, I put masking tape down the middle of the ski. Then a horizontal line where I plan on measuring first. Then Ill get a straight edged piece of paper and line it up with my horizontal line and tightly wrap it around the ski, aggressively creasing it on the edge. Then ill take it off, measure between my creases and mark the center. Then fit the paper back onto the ski (by lining up the horizontal line and lining up the creases. Transfer the center of your paper to the ski and you're all set, rinse and repeat at a few other points. Connect the dots. Fast and pretty foolproof in my experience.
 
Nice work man! If I remember right, when my buddies and I mounted our own skis, we were using some kind of extra strength loctite. But if the wood glue is rated for a lot of stress and temperature changes, you're probably all good
 
Part 3: Plug update

3.1) Managed to get like 25 black plastic plugs from the shop when I bought some wider brakes, and finally located some Titebond III at a local woodworking shop this afternoon. Wanted to get the plugs done tonight to let them cure overnight before I trim so took the skis home to do work at the computer "workshop'

3.2) Brought together the glue, plugs, skis, a plastic mallet and metal finishing hammer to try them out. Also a damp paper towel to clear off glue residue.

1022383.jpeg

3.3) Dabbed some glue inside the back 4 holes and got my plugs ready.

1022385.jpeg

3.4) First attempt with mallet hammer was awful. Too much bounce back and after 2 strikes I knew that was not the way to do. Switched to the metal hammer and had immediate success.

1022386.jpeg

1022387.jpeg

3.5) The plugs sit a bit proud so I'll have to trim them down with the knife tomorrow.

**BIG NOTE I also noticed that the backmost plug didnt look like a ton of glue got in the hole after the plugs was in and realized a mistake I made. Putting the glue over the hole acts like a little roof, and I thought putting the plug in would push it down, but it probably pushed it out upwards with the air pocket being forced out from the plug. Went to the kitchen to find something.

3.6) For the rest of the holes, I put a dab of glue on and then stabbed it into the hole with a long pointy stick. This broke the glue seal, and let the glue go down farther into the hole.

1022391.jpeg

1022392.jpeg

3.7) Finished hammering in the 12 other plugs, and wiped the glue residue off.

Dowel trimming and drilling tomorrow at lunch.

1022393.jpeg
 
Part 4: Drill n' Mount

Got the final pieces together two nights ago, and ripped out the mount after work yesterday, so here are the final steps / results of my quest.

4.1) Morning after plug install the glue has dried and I went back with the OLFA knife to trim down the plastic nubs flush with the topsheet.

1022698.jpeg

4.2) After trimming a few, I noticed two has small holes in the middle, not positive why this happened, but for the smallest one I filled it with a top up of glue to harden until after work, and the second I attempted to fill with wooden points. **The wood idea didn't work out and just came out at the end of the day, so I filled the hole with more glue. This hole will be covered with the binding so I'm not too worried.

1022699.jpeg

1022700.jpeg

4.3) Now in the endgame, Got all my tools together to finish the mount. Including a new more secure tape on the drill bit at 9mm, and a small stick at 9mm as well to test the holes after drilling.

1022701.jpeg

4.4) Test drilled a hole in a 2x4 to make sure depth is good.

1022702.jpeg

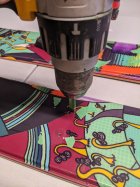
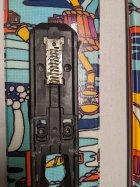
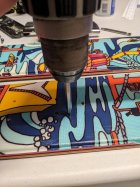
4.5) Drilled SLOWLY all 16 holes in the topsheet, testing with the stick as I went. Took time to check with the 9mm stick in each hole and used the bit to clean out each hole as best I could. Also lined up the binding pieces to check final center.

1022703.jpeg

1022704.jpeg

1022705.jpeg

4.6) Once the holes were drilled, I didn't have a countersink, so I used an wider Philips head to try to taper the top part of the hole, basically just the topsheet, so make screwing easier. I had to push a little hard with this method but it worked.

1022706.jpeg

NOTE: This more "pushed up and out" the topsheet rather than down, so I had to bring out the OLFA knife again and trim off a little bit of volcano-ing to keep things flush, but it did taper the hole as needed so I'm happy.

4.7) Glue in hole, lets-a-go. Used another sharp poke to drop the glue in the hole. Definitely used a little extra glue, but i tried to wipe off a bit with a paper towel, and I figured it might help with the seal to be a tad liberal with it. (The first two holes I was panicking for time a little, so I didn't take photos, but here's the second set.

1022708.jpeg

1022709.jpeg

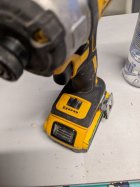
NOTE: For the screwing I swapped to an impact drill, set to 2 for power. 1 was not enough and 3 was a little too much for my liking. I did not have a Posidriv bit, so I used a fresh PH2 bit to reduce the pushing out as much as possible.

1022710.jpeg

4.8) Repeat back end on second ski, and move to the front.

1022711.jpeg

1022712.jpeg

1022713.jpeg

1022714.jpeg

NOTE: Front screws were more tricky, as my bit wasn't long enough with the toe-piece in place, So I had to get a regular long Philips bit. Put a little extra pressure on the top, but still popped out a bit. Screws went in good though, and everything is sitting nice and flush with the ski, no gaps. **The head moved around a bit as well when screwing so I opted to put each screw in slightly to anchor it in place before screwing down to the ski. This kept it aligned with the holes, as you cannot see the holes through the toe-piece to make sure you're lined up correctly like with the heel.

4.9) Final assessment, checked there were no gaps between bindings and topsheet, screws were sitting in the holes nicely, and don't forget to admire your work. Threw the boot in to check that the middle boot mark was night over where my mount point was. Looks good.

1022718.jpeg

4.10) Put new 115mm Brakes on the rear bindings, and slid them on. Now to figure out forward pressure with some more research so I don't break my knees.

1022719.jpeg

Final result. Real test is when they stay on my feet, but I'm confident. With practice you could probably nail this whole process in like 2 hrs from printing to screwing, much less with the right tools. Took my time for a first shot, but its not overly difficult.

1022716.jpeg

Thanks for the help, everyone.
 
14363396:.nasty said:
Using any epoxy for ski mounting is never recommended. The wood glue you have is plenty sufficient.

Titebond II is not water proof, thus not great in this application as its main purpose it to keep water away from the wood. Titebond III would be better suited to ski mounting. Long cure marine epoxy is absolutely the best adhesive to use when mounting skis.
 
Back
Top