You are using an out of date browser. It may not display this or other websites correctly.
You should upgrade or use an alternative browser.
You should upgrade or use an alternative browser.
Finger Jibbin'
- Thread starter YongLa
- Start date
DaffyDaDak
Member
definitely making a pair for school
Holy throwback, I remember this thread
13609499:schjf said:View attachment 807715
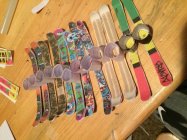
For a while i got really into it and made a ton, I made them short so theyre maneuverable but stretched the topsheet image on word so that it wouldn't be too skinny
You got very passionate about this. congradulations.
fries
Active member
13610248:bait said:You got very passionate about this. congradulations.
Hahaha it was in the middle of the summer when I wanted to ski so bad and that was partly why i got so obsessive with the finger skis
Ranch
Member
7853156:Laurent. said:Laurens' tutorial for the perfect miniature skiAlso in the finger jibbingcult:https://www.newschoolers.com/web/members/cultforumthread/thread_id/522677/Oke so after a lot of people asking for a tutorial on how to make my miniature skis I will now show you how in this tutorial.We begin with the materials, there isn't alot you need:A printer (which can print on thick photopaper)Glue: This is important no sisy 5 year old glue or a gluestick no you want high grade instantglue, you want the one with the most warnings on the package.This will ensure the ski will not delaminate.(get one of those tipper versions: cause you need very little glue)Scissors: Manly scissors. Don't use little children scissors but get big titanium scissors. (don't use a knife cause photopaper and knife don't mix very well)Paper: the most important, use 10X15cm (4X6inch) 260gram instantdry photopaper. This makes the ski stiff,firm & solid, but still flexable and bendable.A stock Photo (of the ski you want.)Step 1:Find a stockphoto atleast 1000 pixels wide and which has the basses in the exact same size (saves photoshop time).I got made this one: (to save paper i combined 2 stock photos) Step 2
rint on highquality settings making sure the skis are printed completly.
 Step 3: Cut the skis out: first do a rough shape then do the exact contour leaving no white edge.
 Step 4: The most crucial: smear a tiny amount of glue over the entire length of the ski.Step 5:Now add the topsheet.Remember that instantglue is instant (duh) so you can't change it after you applied the glue.And make sure you attach the right pieces the right way round.Step 6: Trim the edges.
 Step 7:Repeat for other skis.Step 8: Gently bend in the desired shape.Step 9:ShredStep 10:Add some tiny rubberbands to keep them together for your next session.Showcase:


wait do you print the images on the photo paper or is the photo paper the top sheet.
tris10radeka
Member
does anyone know where I can go to get mine de-tuned? too many paper cuts
TeddyCharlton
New member
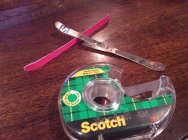
best material to use for the ski is an old gift card. Just bend up the tips for twin tips and the cut it to the length you want. And I used duct tape for the bindings.
TeddyCharlton
New member
my finger skis
xxACIDTRIPxx
Active member
This thread kicks ass
skiguy04
Active member
14092519:HYP3R_REAL1TY said:This thread kicks ass
Someone teach me how to do a backflip on my finger skis
... I speed check every time
FruitBootPro
Active member
I forgot about this thread lol. Epic
fries
Active member
14092660:skiguy04 said:Someone teach me how to do a backflip on my finger skis
... I speed check every time
Honestly man, the biggest struggle in my finger skiing career is the fact that human wrists simply cannot rotate enough for flips and spins. My rail game is pretty strong ngl. But I'm limited by my mortal body when it comes to big air.
skiguy04
Active member
14093852:fries said:Honestly man, the biggest struggle in my finger skiing career is the fact that human wrists simply cannot rotate enough for flips and spins. My rail game is pretty strong ngl. But I'm limited by my mortal body when it comes to big air.
Damn u gotta get more dislocation in your rotation
Was gonna do a tutorial but been injured most this season...
got hang nail trying lip 2


